With winter upon us, the work continues, but weather controls what can be done & when (as is often the case in the area). The main concern is the weatherization of the house which is a continuing process as products improve or change. The house's walls have blown insulation behind the old lathe and plaster walls. So as we remove the old plaster we are working to keep the lathe in place so as to keep the loose insulation in place.
However, when the previous owners blew insulation into the walls the primary zone, the attic, was never insulated. Thus there is a need to determine how best to insulate the original roof of the original building, cacooned inside the attic of the gallery house. The issue is the pitch of the original roof with its original cedar shingles still in place, makes traditional insulating slightly more of a challenge.
Additional to this we have to replace windows which are the original small paned windows built on site by carpenters over 80 years ago.
With the addition of the privacy fence, we also find ourselves evaluating the winter winds & snow/drifting patterns around the house.
We've already found that the enclosed back "hall" that was built along the back porch area last year, and closed off with storm doors, has drastically changed the drafts into the house.
Tuesday, December 28, 2010
Monday, October 11, 2010
Preparing for Fall
As fall is upon us, I'm working to weatherize the house. For those not familiar with weatherization in northern climates, it can be a time consuming issue as NATURE Rules here in "north country" and having Jack Frost INSIDE your home sucks!
So since I have yet to install the newly scrounged windows we're depending on the good ole PLASTIC method!
I've already hung plastic on the inside Bay window, and placed all my patio/house plants into their winter bay area.
I've added expanding foam to the edge of the french doors which we installed on the east side of the house, that provides entrance into the sculpture garden. Hopefully this will help decrease heat loss this winter. I'm also preparing to have the french doors sealed off with Patio Door weatherization kit, if I find that the winter cold seeps in around the edge of the doors. I want a WARM living space!
I still have to install the exterior plastic on the north windows, but that will be only a day long project. I've got the lathe, nails & plastic sheeting ready and just need to take a day (with a handy observer for safety) and get it done before the end of October!
The upstairs hall way window has a "storm window" that was salvaged as an Interior dead air space, on the old window. It adds needed dead air space & I'm hoping it will deter the drafts that occur at that old sash window.
We've managed this summer to reclaim numerous windows that will be able to be used as replacements for the old sash windows throughout the Gallery house, especially those facing south, upstairs.
Its our goal to increase the number of south facing windows so as to increase the potential for passive solar heating benefits. So with all the windows I was able to reclaim this summer, we should have enough for that purpose. It will simply require we wait until next summer for the construction process, which requires we open up the side of the house to the elements for a day or so, as the new window spaces are created.
So for now that portion of the remodel waits for the warmth of spring & summer. For now, we focus on the arctic cold that will be upon us sooner than we'd like.
Friday, July 30, 2010
Rain, Rain, Go away.... come back another ......
Yep since the day I started painted the new porch railing, I've had either RAIN or heavy dew! Its made it impossible to paint the second rail. So I simply have to wait until we have enough dry weather that the wood is dry enough to be painted.
In the meantime, I've been working on the kitchen. At least the indoor remodeling process can continue.
I've painted the kitchen upper cabinets a soft buttery yellow. Also the walls on the west side of the kitchen, nearest to the upper cabinets.

The lower cabinets, drawers and the south & east walls of the kitchen have been painted a bright canary yellow. This has worked well as these areas have far less light reflecting off them & the brighter color seems to help brighten the whole room as a result.

I've found a linoleum that I think will work nicely in the kitchen, giving it a needed face lift. The current flooring it the original wood flooring which is over 100 year old soft wood. Its quite worn & patched in places and still having the original trap door that went to the original root cellar, which is now accessed from a staircase in the back porch area.
In addition to the Kitchen, I've spent a bit of "rain time" on setting the rest of the steel posts and installing the lattice work walls to the Secret Garden sculpture space. I gathered the lattice this past spring when the local town of Brookings had its "Spring clean-up" where by residents put out onto the curb items they are willing to give away or, if no one takes it, have the city haul away. This allowed me the means to reclaim numerous lattice work panels which for a few months have been piled in the intended area, waiting for me to install them.


Now that they are installed, I can begin clearing the construction debris from the installation of the french doors & focus on the paved patio area, walk paths, and sculpture pedestals.
I've begun collecting reclaimed paving bricks to be used for the patio area and hope to find reclaimed rocks for paths and border areas to add to the sculpture garden space. My goal is to have a designated space within the garden that a bistro table and the two small pink & black chairs can be placed, giving people an opportunity to sit and have coffee or a cool beverage in the quiet garden space.


I've been reading about various cobble stone techniques as well as paving techniques. Though the space is narrow, I'm still going to be challenged at finding enough reclaimed bricks of the same style to complete the process. So I've decided to utilize some design techniques that will allow me to mix paving mediums and hopefully provide some visual inspirations. We shall see as time goes on, if I'm able to accomplish the goal.
Already I am beginning to place sculptures into the Secret Garden that Eric currently has stored, so as to begin the process of determining where within the garden spaces should be created.

The first to be placed was the newly painted sculpture "nocturnal". It was one I got as a gift from Eric. Its steel & field stone, with a very "earthy" feel to its form. I love the piece! I'm very happy to have it placed in my garden. The main challenge now is figuring out what sort of plantings I want to put at its base. I suspect hosta would be a good choice, but perhaps fern would be even better.
I'm also looking at changing the spacial use of the "Wall" which is the exterior wall of my "white room" studio. The large blank wall initially seemed to me to be a problem space. But as I consider wall relief space, I realize that large SOLID wall is one of the few places I can hang wall reliefs securely!

The current "framed vase" which I created will be moved to a lattice work wall, as it has little weight involved & could easily be installed on a lattice panel unit. The outdoor "hutch" also will move and be placed near the bistro table & chairs, after their space is determined.
So the remodeling continues and in so doing -- the changing of my decisions, from one moment to another as problems & solutions arise during the process. However, where things are changing, I'm also seeing progress which is the key to keeping inspired during this process. I've finally got a designated space for the Secret Garden and my kitchen is beginning to take shape. The "red gallery" is also beginning to take on its role as well. Things are therefore moving forward, despite the rain.
In the meantime, I've been working on the kitchen. At least the indoor remodeling process can continue.
I've painted the kitchen upper cabinets a soft buttery yellow. Also the walls on the west side of the kitchen, nearest to the upper cabinets.

The lower cabinets, drawers and the south & east walls of the kitchen have been painted a bright canary yellow. This has worked well as these areas have far less light reflecting off them & the brighter color seems to help brighten the whole room as a result.

I've found a linoleum that I think will work nicely in the kitchen, giving it a needed face lift. The current flooring it the original wood flooring which is over 100 year old soft wood. Its quite worn & patched in places and still having the original trap door that went to the original root cellar, which is now accessed from a staircase in the back porch area.

In addition to the Kitchen, I've spent a bit of "rain time" on setting the rest of the steel posts and installing the lattice work walls to the Secret Garden sculpture space. I gathered the lattice this past spring when the local town of Brookings had its "Spring clean-up" where by residents put out onto the curb items they are willing to give away or, if no one takes it, have the city haul away. This allowed me the means to reclaim numerous lattice work panels which for a few months have been piled in the intended area, waiting for me to install them.


Now that they are installed, I can begin clearing the construction debris from the installation of the french doors & focus on the paved patio area, walk paths, and sculpture pedestals.
I've begun collecting reclaimed paving bricks to be used for the patio area and hope to find reclaimed rocks for paths and border areas to add to the sculpture garden space. My goal is to have a designated space within the garden that a bistro table and the two small pink & black chairs can be placed, giving people an opportunity to sit and have coffee or a cool beverage in the quiet garden space.


I've been reading about various cobble stone techniques as well as paving techniques. Though the space is narrow, I'm still going to be challenged at finding enough reclaimed bricks of the same style to complete the process. So I've decided to utilize some design techniques that will allow me to mix paving mediums and hopefully provide some visual inspirations. We shall see as time goes on, if I'm able to accomplish the goal.
Already I am beginning to place sculptures into the Secret Garden that Eric currently has stored, so as to begin the process of determining where within the garden spaces should be created.

The first to be placed was the newly painted sculpture "nocturnal". It was one I got as a gift from Eric. Its steel & field stone, with a very "earthy" feel to its form. I love the piece! I'm very happy to have it placed in my garden. The main challenge now is figuring out what sort of plantings I want to put at its base. I suspect hosta would be a good choice, but perhaps fern would be even better.
I'm also looking at changing the spacial use of the "Wall" which is the exterior wall of my "white room" studio. The large blank wall initially seemed to me to be a problem space. But as I consider wall relief space, I realize that large SOLID wall is one of the few places I can hang wall reliefs securely!

The current "framed vase" which I created will be moved to a lattice work wall, as it has little weight involved & could easily be installed on a lattice panel unit. The outdoor "hutch" also will move and be placed near the bistro table & chairs, after their space is determined.
So the remodeling continues and in so doing -- the changing of my decisions, from one moment to another as problems & solutions arise during the process. However, where things are changing, I'm also seeing progress which is the key to keeping inspired during this process. I've finally got a designated space for the Secret Garden and my kitchen is beginning to take shape. The "red gallery" is also beginning to take on its role as well. Things are therefore moving forward, despite the rain.
Wednesday, July 21, 2010
RECLAIMED Ballast Rods
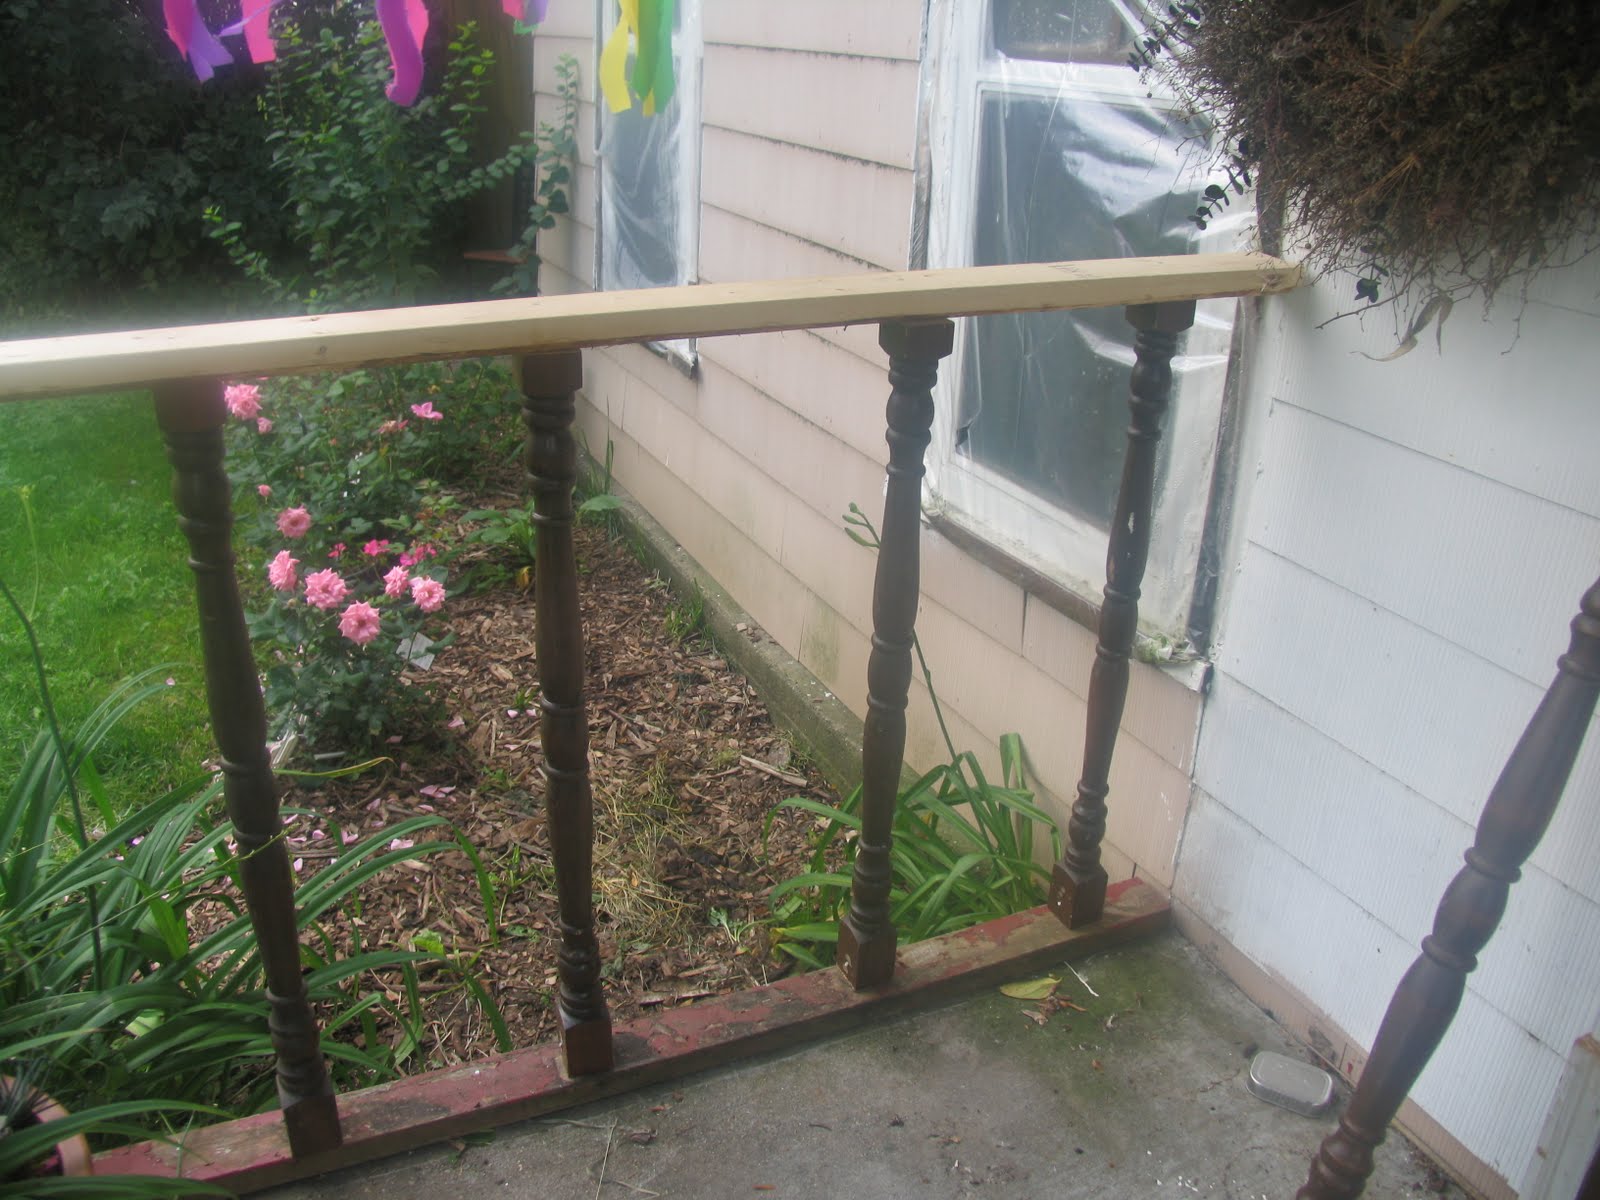
Yesterday (July 20th) I spent the morning building my porch railing for the Gallery House while waiting for a couple of friends to show up for another project (they were moving their belongings from a storage unit to a space in our west house).
I acquired the ballast posts from Habitat Restore in Brookings for $1 each and also the lumber, nails & paint!
It only took a couple of hours to build the railing and to install it. May not be fancy but it does the trick!

Once I got the railing built, I began painting it. That helped a thousand fold to make it fit into the look of the porch!

The next step will be to finish the painting of the porch trim and eaves of the house as well as the extra wide door trim that was installed earlier this spring.
I acquired the ballast posts from Habitat Restore in Brookings for $1 each and also the lumber, nails & paint!
It only took a couple of hours to build the railing and to install it. May not be fancy but it does the trick!
Once I got the railing built, I began painting it. That helped a thousand fold to make it fit into the look of the porch!

The next step will be to finish the painting of the porch trim and eaves of the house as well as the extra wide door trim that was installed earlier this spring.
Thursday, July 8, 2010
Secret Garden landscaping & hardscaping
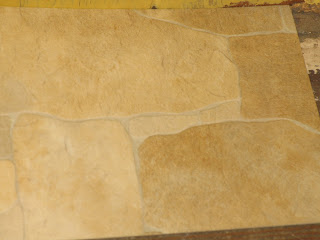
Well today I work on the hardscape of the "Secret Garden" sculpture garden. Come mosquitoes or rain the hardscaping needs to be installed. So I've got myself a can of 40% deet repellant for myself and figure the rain can't hurt me. So hopefully I can get the paving stones in place and the trellis walls installed.
My frugal hunt for paving materials has paid off. I was able to get over 200 paving stones for free, thanks to our local freecycle.com. They will work well to start the paved path that will run through the sculpture garden.
I've got also some ceramic tiles previously from the local freecycle, which will be used in one area to make an accented bistro area that is distinct in its "flooring" pattern from the other areas.
I've been decorating the secret garden with outdoor "decor" to make it a space that is more like an indoor space, then an outdoor space.
I planted shade loving plants along the parameter of the space to give it more appeal visually as well. I want to create a secure area that can be accessed from the Blue Gallery, that will allow customers an opportunity to see sculptures in a garden space, yet keep the space separate from our private yard.
The secret garden approach appears to be accomplishing that task nicely.
The most challenging part is having it so that sculptures aren't all viewed from one spot in the narrow space. I'm trying to determine how I can make hidden niches without the use of low cost lattice work. I'm considering using some concrete Niche techniques where I build niches here and there using concrete block and other natural materials. But that will be for another day. Right now, I'm just working to get the parameter walls put into place and the primary paved "floor" into place.
Hoping this will improve the appearance several times over, from the current old wire fence overgrown with vine and the view of the neighbor's kitchen wall.
Friday, July 2, 2010
Summer - the season of construction
We're working to get the red gallery ready as a retail exhibit space. We've been shifting the furniture that was in the room temporarily while we remodeled up stairs, and now have cleared almost everything out.
We still have to repair the window panes of the bay window and replace the storms for all the windows. The ugly green shag carpeting was pulled out, accept for that which was mounted on the bay window wall, below the windows. That will soon be peeled off and discarded as well. (But its soooooo attractive! YUK!)

We have original wood flooring throughout the room which we will be sealing with a layer of paint (as was the historical way to deal with wood floors). Along the edge of the room, you can see the remnants of the green floor pain that had been painted onto the floor where the area carpet had not been. It was a common practice at the time. We will however be painting the entire floor and then place the area rug (see in photos) back into the room.

We're also working this weekend to create more custom steel shelving. Some will be pedestal styles similar to those in the photos and others will be glass topped shelving with steel framing. Hope to border most of the room with shelving that can display works of art & fine crafts.

The process is introducing me to whole new levels of frugal. Went to the Habitat Restore and found some interior paint. Not enough of any one color to compete the tasks at hand, but its helpful having an artist at home who knows what colors will be produced when we mix different colored paints!
We've also decided that we will be using the technique in which we rag a second layer (of a different color) over the top of a previous painted area. This allows us to use less of one color to coat an entire wall or room.
Next major scrounging will be for suitable wood to make custom trim. We've got the router and hope we're able to get the needed boards to make the older styled Mop boards which are far deeper & wider than modern trim boards. In so doing, we hope to create the look of the original era of the home. Only time will tell how successful we are.

Earlier in the spring we were able to install the needed wall heating furnace. Its visible in some of the images. Unfortunately the only wall we were able to place it on was the "Red wall" which was our accent wall. Unfortunate in that the ivory colored wall heater is a blatant soar, in my opinion, on the otherwise attractive accent wall. I've considered using some camo techniques and take and build a false mantel around it so that it looks less obtrusive. I've got the needed 2x4s and wainescotting that I could perhaps full it off. As well has having recently obtained some great looking rough sawn planks which would make a great mantel.
Sunday, May 16, 2010
A little closer to completion
Well, spring is upon us & so now we find outselves trying to be both inside remodeling & outside working in the yard during the short warm season of South Dakota.
The library (ie guest room) is basically finished. All the mudding is finished & the sanding on the walls is complete. Now we just have to add the trim & build the book shelves.
The next room to be worked is the walk-in closet which already has had the old plaster as well as the old window removed & new sheet rock installed. The room is already looking much smoother in its design & we are excited to see it finally complete.
We've also taken a break in the spring rains to install the new french exterior doors in the blue gallery. Hopefully having it in early means I will have plenty of time to landscape the yard just outside, giving the "secret garden" some nice touches so that it compliments the overall affect of the space.
Wednesday, February 17, 2010
Another day of challenges
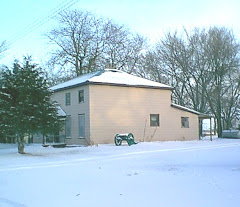
Today I am in a state of "spring cleaning"...though spring is weeks away. Ok MONTHS it seems! We still have over three feet of snow burying our yard & a good foot or more on the roof. But that isn't stopping me. I figure a bit of good ole fashioned cleaning inside will do me wonders!
We've changed the heating system a bit this winter. Converting over to porcelain tile, wall mounted LP heating units. The house seems warmer & considering the outside temp is well below zero at night, I know its not my imagination.
The future library/guest bedroom is coming along. We've gotten the stud wall put in, replacing the previous wall that a previous occupant removed. Hoping to wire the area this weekend.
The ice & snow is making running havic on my plans. I seem to spend much of my time monitoring the ice pack on the back porch area to make sure its not creating any damage. I'm glad I didn't replace the rain gutters yet, as the current ones are being pulled right off from the building due to the slowly moving ice sheet that is on the roof. Luckily we had planned on ripping them off come spring & replacing the patch work rain gutter system with a seamless gutter & heating-cable system. This winter proves the cable heating system is a definite need if you are going to have lower pitched roofs in this area.
Wednesday, January 20, 2010
the walk-in closet
I've finally dove in.
I'm finally tackling the walk-in closet that I have wanted to create by converting the small sleeping room that is across the hallway from my bedroom, into a closet. The room is a very small room by today's standards measuring only 12 feet long and approximately 8 feet wide. So its ideal for a walk-in closet & solves the problem of the master bedroom not having a built in closet.
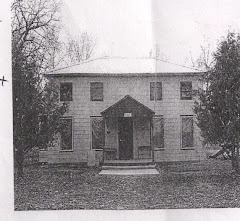
I had to begin by removing all the things we've had piled in the room, so that I could begin refurbishing the walls, which are original plaster walls from when the house was a hotel in the 1890s.
I'm finally tackling the walk-in closet that I have wanted to create by converting the small sleeping room that is across the hallway from my bedroom, into a closet. The room is a very small room by today's standards measuring only 12 feet long and approximately 8 feet wide. So its ideal for a walk-in closet & solves the problem of the master bedroom not having a built in closet.
I had to begin by removing all the things we've had piled in the room, so that I could begin refurbishing the walls, which are original plaster walls from when the house was a hotel in the 1890s.

The original wallpaper was quite "busy". Far too busy of a pattern for the size of the room, in my opinion.

So I'm hoping this new paper will work better in the space. Its nondescript, but I think that will work best for the back wall of the closet area.

The next step is to remove the old plaster on the south wall (Carefully) and to also remove the old window frame & glass. Its our intention to completely wall off this area & remove any evidence of a window. No need for the window in the closet. 
Once I have successfully removed the old plaster & the window, the task of installing new sheet rocking begins. Then we will install the support boards that will be mounted at both ends of the closet & hang the brackets that will hold the pipe that will function as a closet rod.
I've long wanted to have a cubical section in my closet & yet wasn't sure how I'd do it without spending a chuck of money on some new cubical section that is made ready to install. While there is nothing wrong with that approach, it defeats my efforts to use as much reclaimed & recycled as I can. But then it occurred to me. I have perhaps the perfect object sitting in the house already. Its a solid wood headboard that we've used on-end as a tall narrow bookshelf. Its ideal for what we are needing & can easily be painted to fit into the paint color that will be used in the closet. Its also large enough for the largest hat box we have (as shown in the photo). An added bonus is that we can readily drill the hole through the upper section to slide the closet rod through & thus give the rod extra support with the wood frame of the shelving.

The closet section will also have a wire shelf mounted a few inches above the closet rod, going the full length of the closet so as to provide a place to readily store the hat boxes (shown in the photo).
Another design aspect I am looking to add is a wall section (where the window currently resides) that will be more shelving, so that we can place show boxes & other organizational containers at the end of the closet. These shelves will be placed above the built in dresser that I have that is a reclaimed buffet that's legs where cut off. It, like the old headboard will get a new coat of paint so that it looks like it belongs.
Subscribe to:
Posts (Atom)


.jpg)